Wednesday, August 31, 2016

Pumpkin Spice Coffee

Yesterday, I discovered a half cup of homemade pumpkin puree in my freezer from last year. 

Pumpkins happen to be one of my favorite things about fall.

We had some large unexpected expenses this summer, so I am trying to stick to a pretty strict budget. While we do not buy many processed foods, my dairy-free coffee creamer is an exception and I opted not to buy it for a while to save some money.

When I had to cut sugar completely out of my diet a few years ago, I only added almond milk to my coffee. I could do that again.

Seeing the pumpkin in the freezer, I realized I would not have to! I discovered a recipe at accordingtoelle.com for Homemade Pumpkin Spice Latte Syrup last fall. I liked it in my coffee and my eldest son loved it in hot cocoa. 

This morning, I whipped up a double batch using my homemade pumpkin puree and freshly grated nutmeg. I plan to freeze half of the syrup in tablespoon portions (using an ice tray), as the syrup should be used within 2 weeks and I doubt I will make it through the double batch in that time.

Coffee + almond milk + 1 scant tablespoon of pumpkin spice latte syrup = Yum!

I must confess, I always got excited when Starbucks began offering their seasonal pumpkin spice lattes in the fall. However, it is my understanding that when Starbucks began using real pumpkin in their syrup, they also added condensed skim milk. 

Elle's recipe allows me to treat myself to a pumpkin spice latte without dairy and at a fraction of the cost. Sweet! If you missed the link above, the recipe may be found HERE.

Wishing you all a fantastic day!
Renee

Wednesday, October 14, 2015

The Daring Cooks' October 2015 Challenge: Have a Rice Day


For the month of October, Sawsan from Chef in Disguise challenged us to prepare a rice based main meal that represents our own culture, or one from a cuisine that we would like to explore.

I chose to share a Dutch Meatball Soup recipe. This soup reminds my husband of his grandmother. It reminds me of the winter we visited his Dutch relatives. It was one of the coldest winters they had in years, so the pond behind his Aunt and Uncle's home had frozen over. I had such a wonderful time watching everyone ice skating on the pond. (Seven months pregnant at the time, I did not dare join the fun.) That evening, his aunt made balletjessoep (meatball soup) for dinner. 

Rice has been a favorite staple in our household for as long as I can remember. On our first date, my husband brought everything he needed to my apartment to cook a chicken stir-fry dinner, including chop sticks. I can still remember him laughing as he taught me to pick the rice up with the chopsticks. 

In 2013, I began having some health issues that turned out to be food related. The long list of foods I need to avoid and/or limit discouraged me from The Daring Kitchen Challenges. Now, I am ready to face the challenge of adapting the recipes so they better fit my dietary needs. Rice is one of the foods I need to limit, so a small bowl of meatball soup was a real treat for me. 

This recipe was adapted from the book, Dutch Touches. According to this cookbook, the original recipe was submitted by Marian Schoolland from Grand Rapids, Michigan. I adapted the recipe to make it gluten-free and egg-free. The rice does a wonderful job of thickening this soup and I love the touch of nutmeg.


First, I chopped 2 stalks of celery. Then, I peeled the carrots. 
The Genius Nicer Dicer my mom gave me for Christmas made chopping the carrots and onion a breeze. 
I just sliced them and diced them.
I set the veggies aside.
Next, I brought the water to a boil, added the rice 
and set the timer for 20 minutes.
While the rice was cooking, I measured the bread crumbs, 
nutmeg and salt in a small bowl and mixed them well.
I mixed the ground beef and bread crumb mixture together 
in a medium-sized bowl.
Then rolled the beef mixture into meatballs.  
I like small meatballs, so these were 1/2- to 3/4-inch in diameter. 
I placed the flour on a dinner plate, lightly dusted the meatballs with flour, and then set them aside on a clean plate.
When the timer for the rice went off, I added the vegetables and the meatballs to the pot and let the soup boil for 20 minutes.

Normally, I use this 20 minutes to clean my kitchen. However, I purchased 2.5 pounds of ground beef (as it was $1.00 less a pound.) So, I mixed a second batch of meatballs.
I put them on a baking tray lined with wax paper and froze them and then transferred them to a Ziplock freezer bag. 
They are all ready for the next time I make my hubby meatball soup. All I have to do is take them out the night before.
By the time the meatballs went in the freezer, our soup was done.
We sprinkled the top with freshly ground pepper (after this photo was taken) and enjoyed!

 My youngest is not a big fan of this soup, but he ate some anyway. I haven't told my eldest son I made it. He's at college and would be disappointed that he missed out!

Dutch Meatball Soup
Serves 8-10

Mandatory Items:
Large Pot
Cutting board
Knife
Veggie Peeler
Wooden spoon (or large plastic spoon to stir soup)
Fork
Small bowl (to mix bread crumbs and spices)
Medium bowl (to mix ground beef)
Measuring cups
2 Plates (1 for the flour and 1 to put the floured meatballs onto)

Ingredients:
10 cups water
1/2 cup rice
1 to 1 1/4 lbs. ground beef
1/4 cup gluten-free bread crumbs* 
1/2 tsp. nutmeg
1 1/4 tsp. salt
1/4 cup gluten-free flour**
3 large carrots
2 stalks celery
fresh ground pepper (optional)

Directions:
1. Peel carrots and chop into small pieces.
2. Finely chop celery, carrots and onion. Set aside.
3. Bring 10 cups of water to a boil.
4. Add 1/2 cup rice to boiling water and boil for 20 minutes.
5. While rice is cooking, combine bread crumbs, nutmeg, and salt in a small bowl. Mix well.
6. Place beef in a medium-sized bowl and mix in the bread crumb mixture.
7. Pinch off small amount of the meatball mixture and roll into meatballs. (I prefer mine small, roughly 1/2- to 3/4-inch diameter.)
8. Pour flour onto a dinner plate or into a pie dish.
9. Lightly dust meatballs with flour and set on a clean dinner plate. (I pour about 1/3 of the meatballs onto the flour at a time, then pick each one up and quickly roll it in my hands. This spreads the flour into a light coating.)
10. When the timer goes off for the rice, add the vegetables and the meatballs. Stir and cook for 20 minutes. 
11. Serve and enjoy! We like ours with freshly ground pepper sprinkled on top.

* I used Ener G brand bread crumbs because they are also dairy-free, egg-free and soy free. I found them in the natural foods gluten-free section at Fred Meyer. (Next time, I need to make my own bread crumbs that are also yeast and corn starch free.)

** I used Bob's Red Mill Gluten Free 1-to-1 Baking Flour, which I also purchased in the Fred Meyer natural foods gluten-free section.

Sawson shared two family rice based dishes with us for this challenge. Click here to see the recipes and the challenge at The Daring Kitchen. Again, I would like to thank Sawsan at Chef in Disguise for this fun challenge!
  

Thursday, July 9, 2015

Do You Have a Favorite Breakfast Sausage Recipe?


Over the past year, I have introduced some processed foods back into my diet. (Things like gluten-free chicken breakfast sausage.) It is time to cut them out again and go back to more home cooked foods. So, I decided to try out a new breakfast sausage recipe yesterday.

I found this Breakfast Chicken Sausage Patties recipe at Elly Says Opa! through this pin on Pinterest. I think the recipe intended leafy dried herbs to be used. I only had ground herbs on hand, so my sausages turned out a bit too herb-y. However, they are still pretty tasty. (There were originally 16. A few may have been devoured before the photo above was taken!) 

I discovered another recipe I plan to try next week. If you have a favorite sausage recipe I would love to know the name of the recipe and which website you found it on or which book you found it in!

Thanks for stopping by!
Renee

Sunday, October 26, 2014

Bacon and Pumpkin Soup

I love fall.  I love crisp autumn mornings and the beautiful colors of fall leaves.  Most of all, I love pumpkin.  It is one of my favorite foods.

There is just nothing like a warm bowl of soup on a cold wet day.  I have been collecting pumpkin soup recipes on Pinterest.  Last week, I tried the Creamy Paleo Bacon Pumpkin Soup recipe Cassy shared on Fed & Fit.  (Click here to check out the recipe and her post.)

This was a great opportunity to use some of the fresh sage growing in my garden and some of the homemade chicken broth from my freezer.  Pork is one of the foods I may only eat on occasion, so this was a fun treat.  The fact that it is dairy-free and grain-free (therefore, gluten-free) meant I did not have to make any adjustments to the recipe.

I liked the soup.  My husband and 17-year-old son thought it was amazing.  My picky eater did not care for this one.

If you try it, I would love to know what you think!  Do you have a favorite pumpkin soup recipe?

Tuesday, August 5, 2014

3 Home Made Fruit Roll Ups and Fruit Leather Recipes

This week we picked 21 pounds of blueberries and bought a pint of fresh honey, 6 pounds of pears, a basket of fresh figs and a flat of freshly picked peaches.  My 14-year-old remembered the peach leather we made last summer and asked if I could make it again.  So, I went on a Pinterest search and found 3 recipes to try. 

Blueberry Fruit Roll Ups

Blueberry Fruit Roll Ups using this recipe from the Sugar Free Mom.  Of course, we used a tablespoon of honey as our sweetener, as we purchased some fresh at the berry farm!

These were a big hit.  (I admit, I only rolled 3 of them.  My tape did NOT want to stick to the parchment paper, and the additional paper felt a bit wasteful to me.  So, I cut the rest into strips and sealed them in a Ziploc bag.


Peach and Pear Fruit Leather

Next, we made a batch of this Peach and Pear Fruit Leather with this recipe from WikiHow to do Anything. 

I put both trays in the oven and set it at the lowest temperature - 170 degrees Fahrenheit - and set a timer for 7 hours.  The blueberry finished early and the peach/pear took longer.

I also made the mistake of scooping two small spoonfuls of the peach/pear batch for my youngest and I to sample before it baked.  Umm... YUM!!!  That resulted with the two of us whipping up a second batch of this flavor and popping it into the refrigerator to bake the next day.  It was a very wise decision, as the first tray was devoured in a day.

Triple Fruit Leather

The third recipe was the only one we cooked beforehand.  We made Triple Fruit Leather using this recipe for Triple Fruit Roll Ups at Food Well Said.  We had strawberries in the refrigerator - leftover from some I bought for a fruit salad I took to a dinner gathering on Saturday night.  The blueberries and honey, we picked/purchased on Saturday.  And the rhubarb came from our backyard.  (It was our first time harvesting any!)  This was my husband's favorite recipe.  I like the tart flavor from the rhubarb.

Unlike fruit roll ups sold in the stores, these have
no processed sugar, no partially hydrogenated oils - or any other ingredients you might read and wonder what they are.  They only take a couple of minutes to prepare. Pop them in the oven for roughly 7 hours and they are done.  They are THAT easy.  Using locally fresh ingredients (with the exception of the strawberries and lemons) also kept our cost down, so they were pretty inexpensive for the amount we made.

Do you have a favorite naturally sweetened fruit leather or fruit roll up recipe?  I would love to know what it is!

Thanks for stopping by

Renee


Friday, April 25, 2014

Easy Potato Sausage & Spinach Hash

Easy Potato Sausage & Spinach Hash
Eliminating eggs, oats, dairy and gluten from my diet made breakfast quite the challenge for me.

I spent the winter drinking fruit smoothies (made from frozen fruit.) I playfully made fun of myself as I shivered through breakfast which generally left my hubby chuckling at me.

For Christmas, the love of my life bought me an amazing (to me) cookbook: The Healthy Gluten-Free Life: 200 Delicious Gluten-Free, Dairy-Free, Soy-Free, Egg-Free Recipes by Tammy Credicott.  It was the first cookbook I had seen eliminating 4 of the many foods I had to cut from my diet. (There is also a website I should check out again one of these days called The Healthy GF Life.)

This recipe is not from that book, but it is one of several potato hash recipes I have made that were inspired by 2 breakfast recipes within the book.

I usually made this dish with fresh potatoes (baked in a 350 degree oven for 40-45 minutes, cooled, peeled and cubed.)  However, a few months ago while my mom was in the hospital (about 45 minutes away), I found myself lacking time and energy.  (I did find it interesting the hospital did not have gluten-free, dairy-free options available in the cafeteria aside from the salad bar - and I cannot eat lettuce, but that is another story...)  So, I decided to try frozen hash browns - even though they contained dextrose. (If you are like me, and wonder WHY sugar is added to frozen hash browns, apparently it assists with the browning process.) To be honest, I prefer to bake potatoes in advance to skip the dextrose and other ingredients in the frozen variety - but occasionally, it is nice to save some time.

This was quick to make, and I could easily make a big batch so there were leftovers for the next day.  Bonus!

My picky eater dislikes potatoes, for the most part, so he is not a fan of this dish.  Some days, I save a bit of the sausage and spinach and make him an egg scramble instead. Other days, he gets a small serving of the potato hash, but is able to reheat a frozen home-made waffle to enjoy with it.

The recipe below may easily be cut in half. This is great served with a fruit smoothie!

Easy Potato Sausage & Spinach Hash


Ingredients:

1 bag hash browns (shredded or diced)
1 lb. gluten-free breakfast sausage (I use chicken or turkey GF breakfast sausage)
3-4 cups fresh spinach, washed and chopped
2-3 Tablespoons cooking oil (I use light olive oil, avocado oil or safflower oil)
Rubbed Sage (optional)

Directions:

1. Add oil to large pot and heat over medium-high heat.
2. Add potatoes and cook according to package directions (or until browned to your liking if using diced baked potatoes, turning after 5-7 minutes)
3. Meanwhile, cook breakfast sausage in another pan, stirring to crumble the meat, until fully cooked and browned to your liking.
4. Add cooked sausage and chopped spinach to browned potatoes.
5. Reduce heat to medium
6. Stir to mix and cook until spinach has wilted.
7. Remove from heat.
8. Sprinkle with a touch of rubbed sage for additional flavor, if desired, and serve.

VARIATIONS:  
1. Saute diced onions until transparent, but not browned, before adding potatoes. 
2. Substitute hash browns with diced baked potatoes (peeled or unpeeled.) Heat over medium to medium-high heat for 5-7 minutes (until brown on the bottom), turn with a spatula and cook another 3-7 minutes (until browned to your liking.)
3. Substitute sausage with diced ham or turkey-ham (preferably uncured.) 
4. Add shredded cheese (I use Daiya cheese shreds in either cheddar or pepper jack, as they are free of dairy, gluten and soy.) 

Monday, February 3, 2014

Apple Peanut Butter Quinoa Flakes

Last year after learning I should stick to a gluten-free diet, I frequently turned to oatmeal for breakfast. During that time, I discovered The Oatmeal Artist (I believe through Pinterest.)

In October or November, I was told I also needed to cut oats from my diet. Although I could not eat them, I prepared a couple of baked oatmeal dishes to add to our traditional Christmas morning brunch. One variety I fixed was Apple Nut Butter Baked Oatmeal.  It sounded SO good.

In January, I tried making quinoa for breakfast - in hopes it would satisfy my oatmeal cravings.  However, the texture was not a big hit in my household. Then, I discovered quinoa flakes.  (My husband picked some up for me at Whole Foods Market.  I also found them at Fred Meyer, but they cost a couple dollars more.)

Quinoa flakes cook a lot faster than oats, so I am making some adjustments as I try adapting some of my favorite oatmeal recipes.

Variations: For those with nut allergies, I am sure this would be great with Sunbutter (I cannot eat sunflower seed products either...)  You can also omit the cinnamon or cut it to 1/4 teaspoon.  (I am supposed to increase my intake of cinnamon, oregano, and garlic, so I actually used about 3/4 teaspoon in mine.) This would also be great with a mashed ripe banana instead of the maple syrup (but, you guessed it, no bananas for me.)

Apple Peanut Butter Quinoa Flakes
Ingredients:
1 cup almond milk (milk or milk substitute)
1/3 cup quinoa flakes
1 small apple, diced (I peeled mine, but you do not have to)
1 Tablespoon Peanut Butter
1/2 teaspoon maple syrup (honey, or favorite sweetener)
1/2 teaspoon cinnamon

Directions:
1. Place diced apples and almond milk in a small or medium saucepan.
2. Bring almond milk to boil.
3. Add quinoa flakes and stir or whisk into almond milk.
4. Continue to boil for 90 seconds.
5. Remove from heat.
6. Stir in cinnamon, peanut butter and maple syrup.
7. Enjoy!

Tuesday, January 14, 2014

Lack of Posts

Hello, all!

I want to apologize for my lack of posts.  To be honest, 2013 threw me a curve-ball.  After months of health problems and medical tests, I was encouraged by a specialist to see a naturopath.  Under his care, I finally learned there were a whole slew of foods causing me issues.

For the most part, I think I have done a pretty good job at taking this well.  Although, I will say this, if you have family or loved ones you frequently invite into your home for meals that have food allergies or sensitivities I strongly encourage you to take the time to provide a couple of things they can eat so they feel included.  (There is nothing like watching everyone around you sating their hunger on the appetizers you cannot eat while your stomach is growling and you are praying the main course will soon be ready so you can eat the meal you prepared and brought along for yourself...)

I have missed the Daring Cooks and Daring Bakers Challenges.  At the moment, I am focusing on finding healthy meals that exclude all dairy, gluten, eggs, oats, rice, bakers yeast, beef, pork, honey, sugar, artificial sweeteners, bananas, blueberries, and the list goes on...

On the bright side, ever so slowly, my stomach is healing.  I've dropped more lbs than I care to mention (I have no doubt cutting dairy, gluten, sugar and honey played a big role in that!). And, best of all, I have had a lot of time to work on crazy quilting - my favorite hobby.  If you are interested, my projects may be viewed on my first blog, Living My Dream at http://monkeyandmutt.blogspot.com/.

Eventually, I hope to learn enough to be able to adapt the meals in the Daring Kitchen Challenges so they fit my current dietary guidelines.  This month's Daring Cooks Challenge looks amazing!  It is called Arancine, and it looks quite tasty.  To see for yourself, CLICK HERE.

I hope 2014 is an incredible year for you!

Hugs,
Renee

Wednesday, August 21, 2013

Pumpkin Pie Oatmeal with a Pumpkin Spice Latte

PUMPKIN!  I prepped breakfast the day before...
I stumbled upon Pinterest about a month ago - after I was flattered to discover photos from my first blog, "Living My Dream" at monkeyandmutt.blogspot.com, had been pinned.  I had heard of Pinterest, but did not really understand what it was all about.  I knew it had photos that sometimes inundated my Facebook home page, but that was about it.  Had someone explained it was a site where you could bookmark your favorite articles, recipes and photos - organizing them on "boards" (in folders) however you liked, I would have been hooked sooner!  The bookmark section on my laptop's browser had been insane before the poor thing died on me.  Thanks to Pinterest, I have not done the same to my hubby's PC.

Anyway... earlier this week it began to feel like fall.  That meant one thing.  Pumpkin.  I absolutely LOVE pumpkin.  So, I searched for pumpkin on Pinterest and began a Pumpkin board.  YUM.

I thank this search for helping me find The Oatmeal Artist.  If you are fond of homemade oatmeal, you seriously need to check out Lauren's website.  (Although, you are probably so much cooler than I am that you already knew this site existed with all of its delicious recipes!)

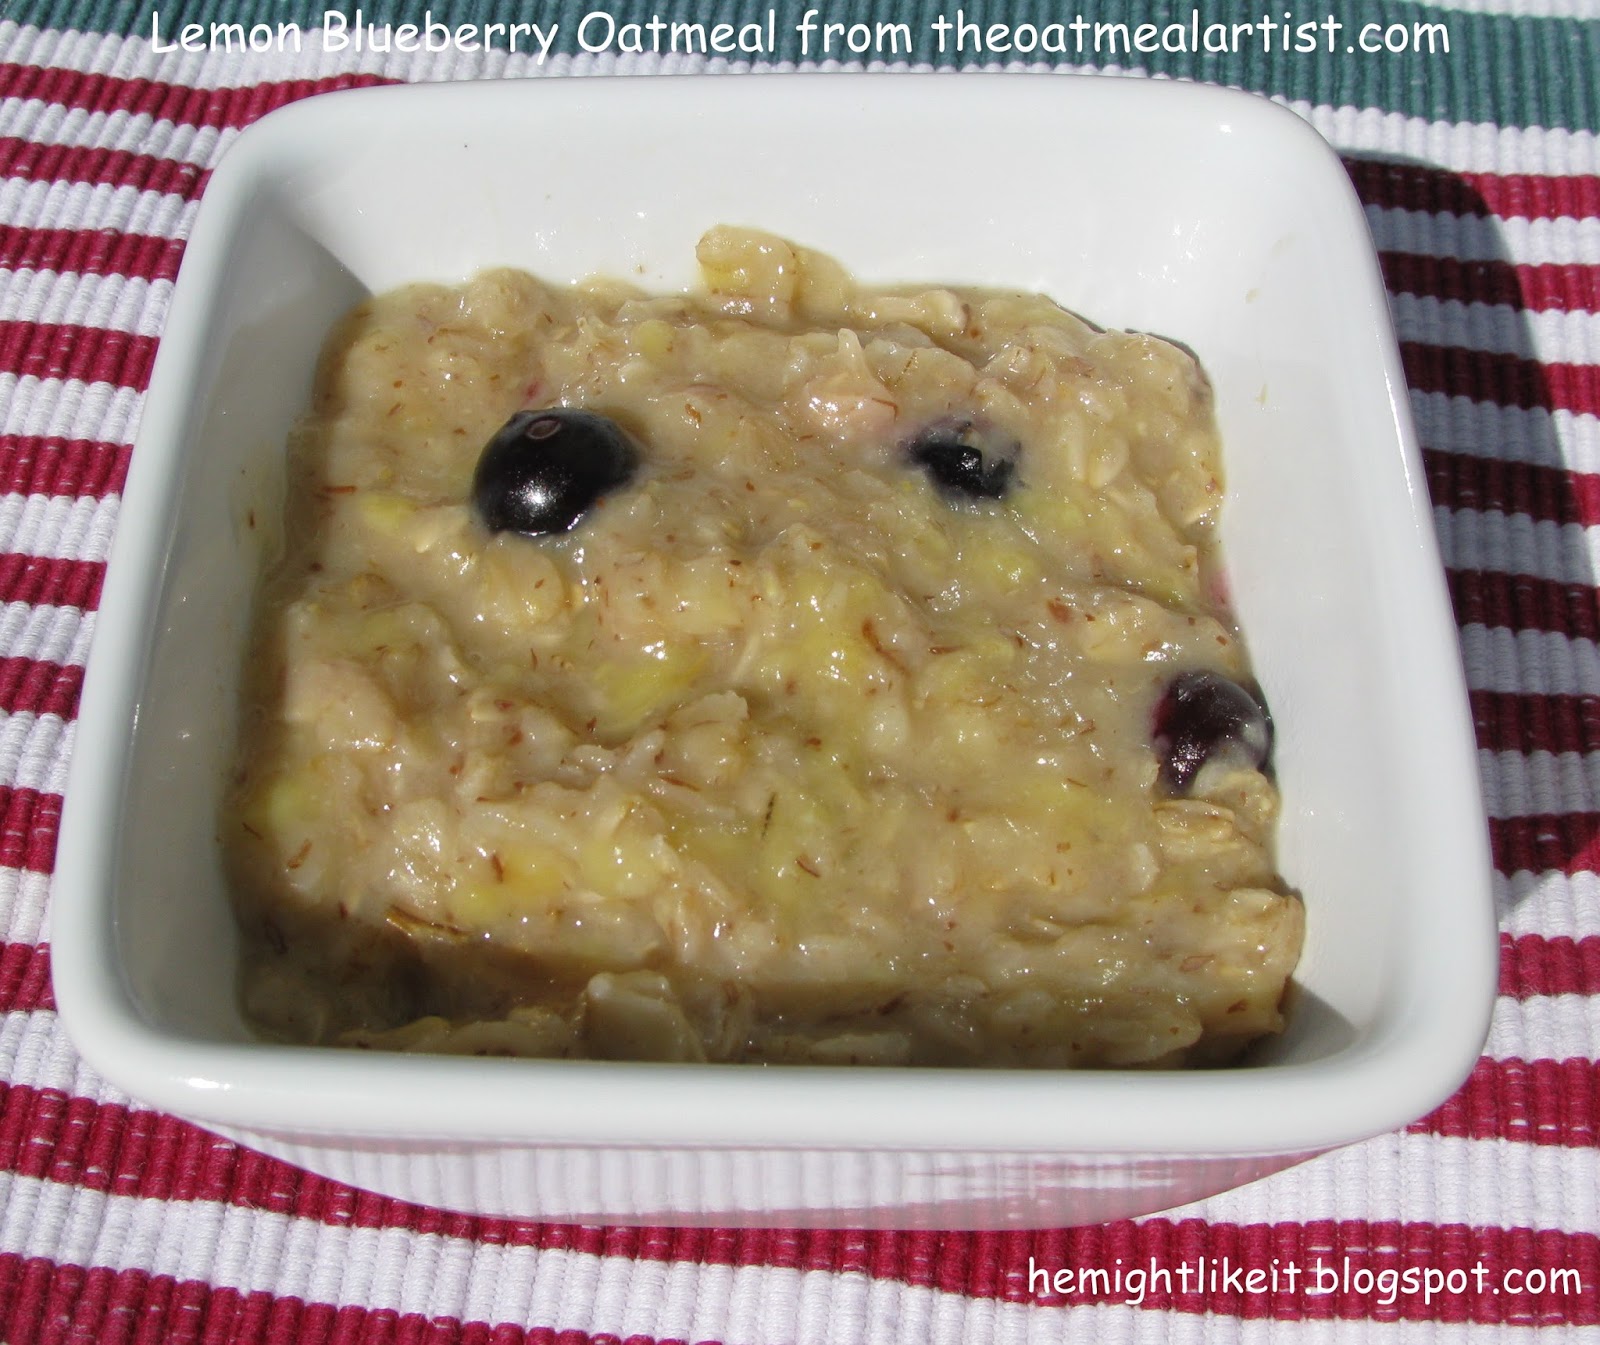
Monday morning I tried the Lemon Blueberry Oatmeal.  I substituted rice milk for the milk and used the 2 Tbsp. of lemon juice suggested.  I only had frozen blueberries on hand, so I added them with the banana.  It was really, really good - not to mention filling!


In my freezer, I had one last cup of homemade pumpkin puree from last fall.  So, I put it in the refrigerator on Monday night to thaw.  Yesterday became a marathon cooking day.  I made tomato soup, The Daring Cooks September Challenge (you'll have to wait to hear about that one!), gluten-free beef broth from Gluten-Free Quick and Easy by Carol Fenster, cooked a roast on the Traeger, and I used my cup of pumpkin puree to make 4 different recipes!

The pumpkin dishes were all prepped to make for breakfast this morning.  My hubby enjoyed a home cooked meal rather than his usual bowl of cereal!

In one Corningware French White 16-ounce dish (I love these, as they are microwave, oven and freezer safe and they have lids), I combined the liquid ingredients for The Oatmeal Artist's Basic Baked Pumpkin Oatmeal.  In a second dish, I combined the liquid ingredients for the Pumpkin Spice Latte Oatmeal recipe.  In two separate containers, I combined the oats and seasonings.  This morning, I combined the wet and dry ingredients and baked them.  (In the future, I will mix all of the ingredients together.  I don't think it will hurt for the oats to absorb some of the moisture overnight.)

and 


Oh - if math is not your strong point and you are making a single batch of the Pumpkin Spice Latte Baked Oatmeal, you would use 8 teaspoons (or 2 Tablespoons + 2 teaspoons) of milk and the same amount of coffee.  (There are 48 teaspoons in one cup, so 16 teaspoons in 1/3 cup.  Half of that is 8 teaspoons, and there are 3 teaspoons in a Tablespoon - so 8 teaspoons = 2 Tablespoons + 2 teaspoons.)
Pumpkin Milk for Pumpkin Spice Latte recipe found at averiecooks.com
Thanks to Pinterest, I also stumbled upon a recipe for a Pumpkin Spice Latte at averiecooks.com.  I made the Pumpkin Milk yesterday (using rice milk to keep it dairy-free) and made these for my hubby and I this morning.  I did not have pumpkin pie spice (GASP!  As a pumpkin lover, this must be some sort of crime), so I used Pampered Chef Cinnamon Plus I had on hand (it added cinnamon and orange flavors to the traditional pumpkin pie spice - if I remember correctly.) 


It turned out to be a bit too much cinnamon for my hubby, but he drank the whole cup!  I'll have to try it again with pumpkin pie spice and add a touch more maple syrup at my hubby's request.  He also pointed out that the spices do not all blend and/or dissolve.  Some settle in the bottom of the cup.  I read the recipe, so it was no surprise to me.  He still drank the whole cup!  I made a half cup for myself (as I am limiting my coffee consumption) and was too full from my oatmeal to finish my latte.  So, I poured the remains into an ice cube tray and froze them.  Later, I plan to blend them with more rice milk for a homemade Pumpkin Spice Frappuccino.  It sounds delicious!  This would probably be incredible with a nice wallop of homemade whipped cream, but with amazing dairy-free recipes like these, giving up dairy is quite a bit easier.  (I'll try whipped coconut milk once I can add coconut back into my diet.)

Overnight Pumpkin Pie Oatmeal from The Oatmeal Artist

Each of these recipes required 1/4-cup of pumpkin puree.  So, I used the last of my puree to make Overnight Pumpkin Pie Oatmeal using another Oatmeal Artist recipe.  This was my FAVORITE recipe!  Don't get me wrong, the baked pumpkin oatmeal was amazing and the baked pumpkin spice latte recipe was great, but this recipe tasted like dessert!  Again, I made it with rice milk to keep it dairy-free.  I also made the mistake of sampling this last night.  It did not survive long enough to be my breakfast tomorrow morning.  As my eldest (nicknamed Monkey) pointed out, it's a good thing it is almost pumpkin season!  (I have plans for the Cinderella Pumpkin growing in my yard!)


Now, I have tried mixing overnight recipes in half-pint mason jars and they just never fit.  So, I mixed this one in a pint-sized jar.  It looks a bit large for the job, but it worked out perfectly.

Let me just say, my youngest (nicknamed Mutt at his request), only likes instant oatmeal.  He has snubbed every homemade oatmeal I have made.  Until now.  He said he would eat this if I heated it up a bit.  (That being said, he has not yet sampled the baked oatmeal recipes I made this morning, but I saved a bit of each for he and his brother to sample.)  I'll make a comment later to let you know their opinions.

I am so thankful for the Internet and for creative cooks that are willing to share their creations!

Homemade Tomato Soup

Better Homes and Gardens Fresh Tomato Soup
The mornings and evenings are getting chilly and last night the moon was full and huge.  My boys register for school today.  In short, it is beginning to feel like fall.

Yesterday, I picked some tomatoes from our garden and tried the Fresh Tomato Soup recipe from my Better Homes and Gardens cookbook.  I also found a copy of the recipe on-line.  In my cookbook, it calls for cilantro or parsley.  I used some of the fresh basil growing on my kitchen counter - so, I smiled when I discovered the on-line recipe actually suggests cilantro or basil.


My boys decided this would be great with a grilled cheese sandwich (even the picky eater!)

My husband felt it was a bit bland.  That may be because I did not have any chicken bouillon granules, so I substituted Gaylord Hauser Vegetable Broth.  I like this veggie broth, but it does not have as much salt as bouillon.

The only hot sauce I could find was Blair's After Death Sauce - from a gift pack of hot sauces I gave to my husband for Christmas.  I only used two tiny drops and the flavor was wonderful without the soup being too hot for my picky eater.

This soup will definitely be made again in our home!  (I even put some in a jar and froze it to see how it holds up.  If it turns out well, I will be making a bigger patch, freezing it in individual portions as suggested for lunches on 100 Days of Real Food.) 

Saturday, August 17, 2013

Almond Butter Chia Pudding

Almond Butter Chia Pudding
Through The Daring Kitchen, I stumbled across Shelley's blog, C Mom Cook.  Her recipes looked amazing - and they were dairy-free, so I had to follow her blog.  (Had to - it was a compulsion.  Take a peek and you may feel the same.)

Yesterday, I read Shelley's post from Monday about Chia Pudding.  Her recipe was inspired by and slightly adapted from Katie's Chi Chi Chi Chia post on her blog, Betcha Can't Eat Just One.  (And Katie has a label for pumpkin recipes, so you know I just have to follow her blog now!)

I am beginning the 5th week of my doctor's 6 week diet - eliminating a slew of foods I normally eat.  This list includes chocolate, coconut, and agave.  But, I really wanted to try this pudding and was sure I could make something work.

I opted to substitute almond butter for the cocoa powder and maple syrup for the agave.  I am still adjusting to almond butter.  The pudding did not taste bad, but my boys were both right, it was not very sweet.  I did not want to add more syrup, so I sliced a banana and stirred it in after the pudding chilled.  (It was devoured before I could take a picture.  Oops!)

Chia Seed Benefits and Risks

Huh.  I planned to find a great link touting all of the wonderful benefits of eating chia seeds and I stumbled upon sights warning of side effects.  My curiosity got the best of me.  I found some info at the webmd.com website.  However, I found the info at seed guides far more informative.  

I encourage you to check out the sites above.  Below, I tried to summarize what I learned...  but I may not have caught all of the info.

There are a ton of benefits to eating chia seeds.  Check out the benefits here. 

As for the side-effects... the following information was paraphrased from webmd.com and seedguides.info.

You should limit the amount of these seeds you consume (for adults it sounds like 2 Tbsp. per day should be the limit - less for children.) 

Pregnant or nursing?  You should avoid chia seeds.
High triglyceride levels?  I recommend checking with your doctor.  Although other websites indicate chia seeds may lower triglyceride levels and raise HDL levels, webmd.com states that some types of chia seeds actually raise triglyceride levels. (This may be due to the high alpha-linolenic acid levels.)   According to webmd, you should only use chia called "Salba," as it does not significantly increase triglycerides.  
Hemophiliac? On blood thinners?  On an aspirin regimen? Preparing for a surgery? Check with your doctor first.  The omega-3's in the chia seeds can cause the blood to thin. 
High risk for prostate cancer? Check with your doctor first.  High levels of alpha-linolenic acid may increase your risk with this type of cancer. (According to webmd, the jury is out on this as studies have shown increased risk and no changes in the risk - but they recommend avoiding alpha-linolenic acid supplements.)
Low blood pressure? Ask your doctor first.  Some research indicates you should steer clear of chia seeds as they could drastically lower your blood pressure.
Take B17 supplements? Adding chia seeds to your diet could cause an overdose.
Allergic to mustard or mustard seed?  High protein levels in chia seeds can contribute to allergic reactions in some people.  Sounds like the risk is higher with allergies to mustard seed.

Almond Butter Chia Pudding

Almond Butter Chia Pudding (Dairy-Free) - Please Read Chia Seed Benefits & Risks 1st.

3/4 - 1 cup almond milk (I used original, unsweetened)*
1 Tbsp. almond butter
1 Tbsp. maple syrup
1/4 cup chia seeds
1 banana (optional)

  1. Blend together almond milk, almond butter, and maple syrup.  (I used our immersion blender with the tall cup it came with.)
  2. Stir-in chia seeds.  Bananas may be diced and added at this point.  Or if you do not want them to brown at all, wait until the pudding has chilled.
  3. Refrigerate at least 30 minutes.
  4. If desired, add sliced or diced banana.  
  5. Enjoy!
*NOTE: The longer the pudding chills, the more liquid the chia seeds will absorb.  I used 3/4 cup almond milk and it was perfect an hour later.  If you plan to chill overnight, you may prefer to use closer to 1 cup of almond milk.

I look forward to trying more varieties of this delicious dairy-free "pudding."

Wednesday, August 14, 2013

National Creamsicle Day - Dairy Free Orange Cream Pops

Dairy-Free Orange Cream Pop

Well, today I should be posting about the incredibly yummy Daring Cooks Challenge for August.  However, I am waiting until I finish this restrictive 6-week diet my doctor has me on to make that incredibly delicious dish.  It will be so much better with onions and garlic, I am sure!

Today, I was fiddling around, looking on-line for some fun lunch ideas to surprise the boys with once school starts up in a couple of weeks.  I remembered a co-worker once telling me there is a National Food Day nearly every day of the year and I thought it would be fun to incorporate a few of those into the school lunches.  I googled National Food Days (I do love Internet search engines!) and discovered this American Food Holiday list stating today was National Creamsicle Day.

My boys thought I was teasing when I told them, and here is why...

Irony can be mighty fun sometimes!  Last week, my 13-year-old (Mutt), told me we should make Jell-o popsicles.  That afternoon, I began skimming through a book by Reader's Digest that I picked up at the library called, Homemade: How to Make Hundreds of Everyday Products Fast, Fresh, and More Naturally.  Guess what I found?  A recipe for Orange Cream Pops using orange gelatin.  (Ironic, right?)  I LOVE orange creamsicles and feared I would have to give them up forever.  Maybe not!  I picked up the ingredients last Thursday and Mutt and I finally made them last night.  However, we started the project so late, they would not be ready until today.  And then this afternoon, I discovered it was National Creamsicle Day.  My boys thought I was joking.  Little did they know... *grins*

I even found an article with a little bit Creamsicle history published August 14, 2012 on eatocracy.cnn.com.  Just CLICK HERE to read it - there is even a "grown-up" recipe included!

Of the four of us, only Monkey can have milk.  So, I adapted the recipe.  I did not want to break any copyright laws by sharing the recipe from the book, so I did another Internet search.  Taste of Home has the exact same recipe listed on their website.  You can find it by clicking HERE.  My recipe is modified to exclude dairy.

Dairy-Free Orange Cream Pops

Ingredients:

  • 1 package (3 ounces) orange gelatin
  • 1 cup boiling water
  • 1 cup (8 ounces) vanilla almond milk yogurt (or your favorite dairy-free vanilla yogurt)
  • 1/2 cup almond milk (or your favorite dairy-free milk)
  • 1/2 teaspoon vanilla extract
  • 10 paper cups or Popsicle molds (3 ounces each)
  • 10 Popsicle sticks (if using cups)

Directions:


  1. In a large bowl, dissolve gelatin in hot water and stir until dissolved.  Allow it to cool to room temperature (we let it sit on the counter for about an hour.)
  2. Whisk in almond milk, almond milk yogurt and vanilla until all ingredients are well combined and smooth.
  3. Pour into popsicle molds and freeze until firm.  OR fill paper cups.  You can put foil or plastic wrap over the tops of the cups and stick the popsicle sticks through to hold the stick straight and freeze until firm.  OR you can freeze the cups for about 2 hours and then insert the popsicle sticks so they will stand straight.
We had a fair amount of the mixture remaining after filling our popsicle molds (which were a fun gift to the boys from their Aunt a few years ago.)  Luckily, we found 3 paper cups stashed away in the cupboard.  I did not have any popsicle sticks, but I found exactly 3 plastic spoons in the silverware drawer.
Dairy-Free Orange Cream Pop in a Cup
The boys declared these a definite "Make Again" treat!  (And I added the Reader's Digest Homemade book to my wish-list!)

Friday, August 2, 2013

July 2013 Daring Bakers' Challenge: Eenie Meenie Miney Moe!

Potato Rösti
In a "celebration" of past Daring Baker and Daring Cook challenges, Lisa challenged all of us to search through the Daring Kitchen archives and pick any one we'd like! The REAL challenge was picking which delicious recipe(s) to try!

And that truly was the challenge!  If you do not believe me, go to the recipe archives on The Daring Kitchen website (just click here) and try to decide for yourself!

In my case, my choices were severely limited, so it made the decision a ton easier.  My doctor has me on an restrictive diet to see if we can figure out if it is a food that has been making me sick - well, another food in addition to dairy.  So, no dairy, no gluten, no soy, no honey, no onions, no garlic, no beans, no fruits with pits; well, the list goes on, but you get the picture.

Here were our only guidelines for the challenge:

Mandatory Items: You must choose at least 1 past Daring Baker or Daring Cook challenge and recreate it by the reveal date.

Variations: Only variations are allowed are those specified in the challenges.
That's it.. all other rules/regulations/tips/tricks/notes/etc. will be found in each challenge - as will each printable file.
Have fun kids! Smile xoxo

Flipping Frying Patties!!!

My choice became a no-brainer when I stumbled across a recipe for Potato Rösti in the February 2012 Daring Cooks' Challenge: Flipping Frying Patties!!!   Click here to find the challenge and the recipe.

Not only could I eat all of the ingredients, but my husband and I had not eaten rösti since we left Switzerland in 1997.  We had always purchased it in a pouch and cooked it up.  I had never made it from scratch.  And, I had already added gluten-free schnitzel to our menu for the week.  Rösti was the PERFECT addition.  It was also a wonderful surprise for my husband.  The boys had never tried it, and I am happy to say, even the pickiest eater enjoyed it.  Success. Yes!
Potato Rösti
Lisa, I loved the challenge - thank you so much!

If you would like to see the other wonderful creations, just click here.  Or, do a google search using the first paragraph of this post to find other bloggers describing their adventures with this delicious challenge!

Sunday, July 14, 2013

The Daring Cooks' July 2013 Challenge: Get Your Yogurt On!

The lovely Cher of The Not So Exciting Adventures of a Dabbler was our July Daring Cooks’ hostess and she asked us to create homemade yogurt in our own kitchens! No incubators needed, no expensive equipment or ingredients, just a few items and we had delicious yogurt for a fraction of the cost and a whole lot healthier than what you buy in the stores!
Coconut Yogurt with honey, blueberries, and homemade granola
I encourage you to stop by Cher's website to see more options for making yogurt from milk or milk substitutes using other thickening agents and cultures.  CLICK HERE for the full challenge and a lot more helpful information.

As I have to completely cut dairy out of my diet, this challenge arrived at the perfect time.  I miss yogurt and hate spending nearly $2.00 on 6 oz. of coconut yogurt.  This method took some time, but was not horribly difficult.  And the coconut flavor and creamy smooth texture of this yogurt far surpassed the expensive coconut yogurts I bought at the store.

Coconut Milk Yogurt

My Ingredient Choices:
1. "Milk": 2 13.5-oz. cans organic coconut milk (not to be mistaken with the beverage in a carton)

2. Culture:  PB8 Pro-biotic Acidophilus for Life Vegetarian Capsules.  I used 6 capsules but should have used 4 (I overestimated the amount of yogurt this would make.)

3. Thickening Agent: 1 packet Knox Unflavored Gelatin  (I wanted to use Agar-Agar Flakes, as I read they thicken the yogurt a bit better; however, the stores I went to did not carry this product and I had the gelatin on-hand.)

4. Sweetener: None (although non-dairy milks will turn out thicker with a sweetener for the pro-biotics to feed on.)

Equipment You Will Need:
• A double boiler or a bowl that can be nested in a pot without touching the bottom or a microwavable glass bowl*
• A whisk, for stirring together ingredients*
• Food thermometer
• A large bowl (or other container) for an ice bath (2-4 cups of ice and 1-2 cups of water – depending on the size of your bowl. You want to be able to cool the bottom and sides of the bowl you cooked your milk in)
• A smaller bowl non-glass bowl that will hold at least one quart if you do not want to put the hot glass bowl into the ice cold water.* 
• A heat source for incubating yogurt - I used my crock-pot
• Glass jars (five to six ½-pint (400 ml) jars) or a glass bowl for culturing yogurt*
• Liquid measuring cup*
• Measuring spoons*
• Pot holders

*IMPORTANT NOTE:  All equipment that will come in direct contact with the yogurt should be thoroughly washed before using, to mitigate the potential of any non-beneficial bacteria entering the equation. I run my equipment through the dishwasher and use the heated dry cycle. Some sources recommend sterilizing in boiling water.

INGREDIENTS:
  • 2 13.5-oz cans organic coconut milk (not the beverage in a carton)
  • 1/2 cup water
  • 1 Tbsp Sweetener (if using)
  • 4 PB* Pro-biotic Acidophilus for Life Vegetarian Capsules (or read the label of your pro-biotic capsules and use enough to have about 25-30 billion pro-biotics for this quart-sized batch of yogurt.)
  • 1 packet Knox Unflavored Gelatin
DIRECTIONS:
  1. Place the coconut milk, ½ cup (120ml) of water and sweetener in a bowl and stir until well blended.
  2. Combine 2 Tbsp boiling water with 2 teaspoons (1 packet is a smidge over this) Unflavored Gelatin.  Stir until gelatin has dissolved.
  3. Prepare the ice bath - combine 2-4 cups of ice in 1-2 cups of water, depending upon the size of your bowl.
  4.  BE CAUTIOUS USING THIS STEP!  Using the microwave to boil liquid can be tricky.  The liquid may not appear to be boiling until it moves around, when it may bubble and splatter up and out.  I used a larger bowl than I needed and carefully placed it on the counter after each minute to stir it with a rubber spatula.  When it was done, the liquid erupted into bubbles as the spatula entered the liquid.  Place the bowl in the microwave and heat in one minute intervals until the mixture comes to a boil. (After each minute, remove bowl from microwave and stir). Depending on the strength of your microwave, this may take 4-7 minutes. (Alternately, you can heat the mixture using the double boiler method).
  5. Once the mixture reaches a boil, remove from the microwave and place the bowl in an ice bath. (NOTE: I poured the mixture into a clean non-glass bowl and then set it into the ice bath, as I recently had a coffee cup sitting on a cool tile counter crack in half when I added hot water for tea...) Stir until the temperature of the mixture drops 90°F/32°C if you are using a pro-biotic starter. 
  6. When the liquid cools to 110°F/43°C, stir in the starter. (If you are using a freeze-dried culture or pro-biotic capsules, make sure the liquid has cooled to the temperature recommended for that particular culture).  NOTE: my culture did not specify, so I cooled to 110 degrees.
  7. Ladle the yogurt mixture into ½ pint glass jars (should be ~5-6 jars depending on how full you fill them), secure the cover.  
  8. Incubation:  I chose to use the crockpot method.  Our directions read: Slow cooker – This is the method that I use the most. To use a slow cooker, place the cooker on its “warm” setting and pour in enough hot water to come half way off the jars. Place the cover on the cooker and check the temperature of the water every ½ hour to hour to make sure it isn’t getting too hot (actual temperature range will depend on the starter type you chose). If the water starts to get too hot, unplug the machine and wrap the crock pot in a large towel to hold the temperature for the rest of the incubation period. However, my hot water was WAY too hot, so I removed the jars and cooled the with cold water until it reached 105.  Then, I returned the jars to the crockpot, making sure the water level was about mid-way up the jars.  My crockpot's warm setting was too warm, so I turned it off, unplugged it and wrapped it with a towel.  I checked the temperature every half hour and turned it on warm briefly if it began to drop.
  9. Incubate the yogurt for about 5-8 hours. Longer incubating times will result in a tangier yogurt. The optimal incubating temperature is ~122°F/50°C for yogurt starters (if you are using a freeze-dried starter or pro-biotic capsules, follow the recommended temperatures for those starters). Ideally, you want to keep the temperature as close to that as possible for the incubating period. Realizing that may not be possible – I try to target keeping the mixture between 115°F/46°C and 125°F/52°C (95°F/35°C to 105°F/41°C if using pro-biotic capsules).
  10. Once the yogurt is done incubating, carefully transfer the containers to the refrigerator and chill for at least 8 hours. This step helps to thicken the yogurt and lulls those ravenous friendly bacteria back to their sluggish state.  Note: To avoid putting the hot jars onto the cold glass shelf in my refrigerator, I folded a kitchen towel in half and put on the shelf first. 
  11. After the cooling period, the yogurt is ready to be enjoyed.  

    Storage & Freezing Instructions/Tips:
    Once processed & tightly sealed, most yogurts will keep, refrigerated for one to two weeks. I have had success with some yogurts keeping for longer, but it usually doesn’t last long enough for me to test that theory.
This is how my yogurt looked after the incubation stage, I panicked until I read on another site that this can sometimes happen.  So, I stirred each jar prior to refrigerating, and they turned out fine!
Even without a sweetener, I loved the smooth texture and amazing coconut flavor!

It was even better with about a Tbsp. honey and 1/4 cup frozen blueberries blended in.
Homemade granola made the perfect addition!
Yummy!

As for my pickiest eater?  He is not a huge coconut fan, and felt the coconut flavor was a bit too much for him; however, with the addition of blueberries, honey and granola, he said he would eat it anyway.

Just for my picky eater, I attempted making yogurt with regular milk, but my warm setting on my crockpot took the temperature over 150 degrees within a half hour.  It must have killed the culture.  It ended up as a liquid with a tad of thickness at the bottom.  I plan to try it again with Lactaid for the non-coconut lovers in my home and with almond milk as another dairy-free option for myself.  (Hmmm... maybe I will make that today...)

Cher, thank you for this amazing challenge!  I was absolutely giddy with excitement about how yummy and relatively easy (thanks to your amazing information) this was to make.

All other readers, I strongly encourage you to use the Daring Cooks July '13 Challenge: Yogurt! post at The Not So Exciting Adventures of a Dabbler if you plan to make your own yogurt.  Cher has oodles of information, links to other resources and options to choose from!

To see more fun yogurt creations, visit The Daring Kitchen.  I was amazed at the creativity.

Thank you for visiting!
-Renee


Sunday, July 7, 2013

June 2013 Daring Bakers' Challenge: Life of Pie


Crostata di Marmellata - dairy free crust & blueberry honey jam filling

Rachael from pizzarossa was our lovely June 2013 Daring Bakers’ host and she had us whipping up delicious pies in our kitchens! Cream pies, fruit pies, chocolate pies, even crack pies! There’s nothing like pie!
Smile

Of our four choices, I chose the Crostata di Marmellata; although I am very late in posting!  Better late than never?  My boys certainly thought so!  It was devoured.


To read the full challenge and see all four yummy choices and their recipes, please CLICK HERE and visit Rachael at pizzarossa. 

I faced several challenges with this recipe (and found myself very thankful for the Internet and blogs!)

First, I needed a dairy-free crust (preferably without resorting to shortening.)
Second, I wanted to avoid using white flour.
Third, I wanted to avoid using refined sugar.

I was so happy to stumble upon Rosalie's Never Fail (Dairy-Free) Pie Crust recipe at The Joyful Baker!  The recipe uses coconut oil instead of butter - brilliant!

I made a couple of modifications to the crust (one of which likely made my work more challenging than it should have been.)  I substituted King Arthur Unbleached White Whole Wheat Flour for the unbleached all-purpose flour.  Bad idea.  Substituting 1/3 cup would have worked better.  I learned my something new!  Whole wheat flour absorbs more liquid than all-purpose flour.  I also substituted 1/4 tsp vanilla for 1/4 tsp of the water.  Yum!  Next time, I will try Rosalie's way of making this crust.  Although I had to put a sheet of plastic wrap over the dough to prevent it from falling apart (likely due to my flour exchange), the dough turned out and tasted really great!

As for the filling... Lisa at 100 Days of Real Food was awesome enough to share a recipe from Ashley Eller (of Sweetie Pie Bakery) for Strawberry Honey Jam.  This jam is pectin free and does not use refined sugar.  I made some and it was delicious!  However, my eldest (Monkey) glared daggers at me for even considering the use of his favorite toast topper.   So, I picked up some blueberries at a local berry farm and made the Blueberry Honey Jam by substituting blueberries for the strawberries.  YUM!

I wanted to make my own apricot jam for the glaze, to completely avoid the use of refined sugar.  However, the only apricots I could find were expensive and not local.  So, I bought a tiny jar of apricot jam and used that for the glaze.

To create this delicious treat I made the jam the day before.

Crostata di Marmellata
1.  I made and canned Blueberry Honey Jam following the recipe at 100 Days of Real Food.
2.  I made the pie crust (mostly - see comments above) following the Never Fail (Dairy-Free) Pie Crust recipe at The Joyful Pantry.

3. Using 2/3 of the pie dough, I baked a single crust as directed in the original recipe.
Shh... pretend I did a better job with my foil and part of the edge is not too dark...

4.  I added two cups of Blueberry Honey Jam.

5. Using the last of the pie dough, I created the lattice topping.  (And cut out a few stars for the 4th of July!)

6. I baked the pie as directed in the original recipe.
7. I made the apricot glaze.
8. After removing the pie, I brushed the glaze onto the pie crust.
Did I forget to mention that my picky eater even ate the edge of the crust?!  It was not secretly disposed of in the garbage.  The magic of glaze?!

Now, to see some real works of art, check out the Life of Pie Challenge in the recipe archive at The Daring Kitchen.  And, don't forget to visit pizzarossa!

Rachael, thank you for this amazing challenge!